Roster
Who this is for: team admins, coaches (parents and athletes can view their own team's roster) Applies to: Android · iOS · Web
What this page covers
The roster is the team's full people list: every athlete, coach, and parent. This page shows you how to find someone quickly, read their member record, and — if you're a team admin — keep the roster accurate (edit members, activate or deactivate them, and download a copy). The roster also feeds the attendance and groups screens.
Before you start
- You must be a signed-in member of the team.
- Searching and viewing member details works for all members. Editing, deactivating, and exporting require team admin access.
Finding someone on the roster
- Open Roster Management from the navigation menu (under Admin Tools).
- To find a person by name, type in the search box at the top.
- To narrow the list, use the filters:
- Role — show only athletes, coaches, parents, or team admins.
- Group — show only athletes in a particular training group.
- Status filters for athletes: Fees Owed, Pitzone Pending, Not Practice Ready, No Account, No Strava. These instantly show you, for example, every athlete who still owes fees or who hasn't connected their ride-tracking app yet.
What you should see: the list narrows to the people who match your search and filters. Athletes who have been deactivated are hidden from the default view.
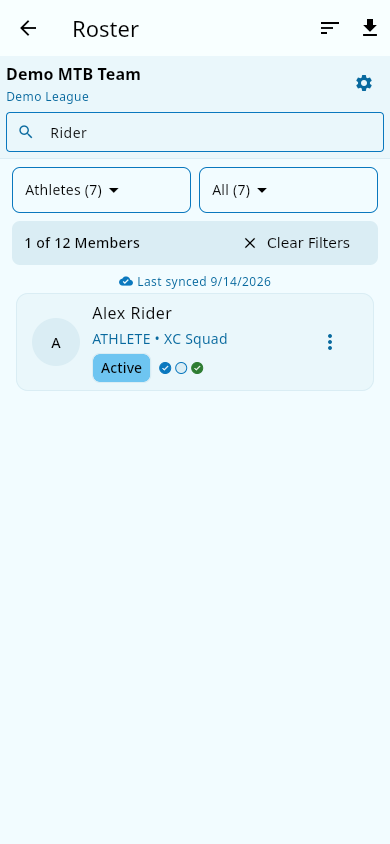 Search ("Rider") plus the role filter in use: 1 of 12 members.
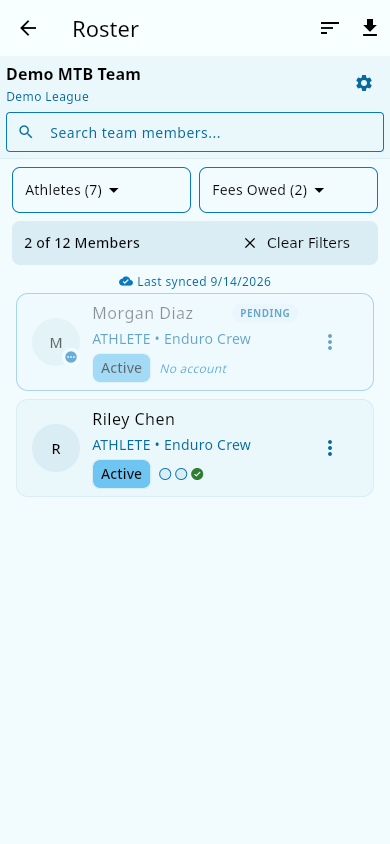 The Fees Owed status filter: only athletes with unpaid fees remain.
Reading a member's record
- On the Roster screen, tap a person's name to open their member page.
- Every member's page uses the same layout: an Overview tab with the person's status at a glance and a Profile tab with their details. Athletes get extra tabs — Performance, Activities, Notes (coaching staff only), and Group — and the layout is the same whether a coach or admin is viewing a member or a parent is viewing their child, so the same person's page always looks the same no matter who opens it.
- On an athlete's Profile tab, a Linked parents card shows the family connections — the parents or guardians linked to that athlete — alongside the emergency-contacts card (see Medical and consents for who can see it).
- Status badges on the Overview tab tell you practical things at a glance, such as whether the athlete has paid team fees, has an account yet, or is cleared for practice (pit zone invited / practice-ready — see Groups).
Coaches and admins also get an actions sheet on this page with the team actions they're allowed to take (for example, sending a pit-zone invite).
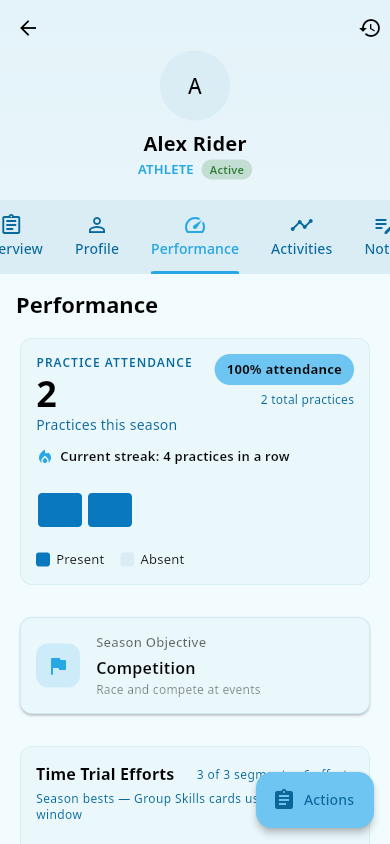 An athlete's member page: the Overview, Profile, Performance, Activities, and Notes tabs across the top, with status and performance details below.
Profile photos
Every member has a profile photo — the circular picture shown on the roster, in chat, and on activity feed cards.
- Open the member's page and tap their photo to open it full-screen.
- Use Take Photo to use the camera, or Choose Photo to pick an existing picture. On the web there's no camera: choosing Take Photo tells you so and opens your photo library instead.
- Adjust the picture on the crop screen — the circle guide shows how it will be framed — then confirm. The new photo appears across the app right away.
- To remove a photo, choose Remove Photo in the viewer.
Who can change whose photo:
- Everyone can set their own profile photo.
- A parent or guardian can manage their child's photo.
- A team admin or owner can replace or remove any athlete's photo on their team.
- A coach can replace an athlete's photo on their team but can't remove it.
What you should see: the new photo replaces the old one on the member's page, the roster row, and the places the person appears (chat, feed). If an upload fails, the app tells you what went wrong instead of saving a broken photo, and you can try again.
Keeping the roster accurate (team admins)
Edit a member. Open the member's record, choose Edit, and update what's shown (contact details, group, athlete info). For an athlete, changing their email can resend them an invitation to create an account.
Activate or deactivate a member.
- Open the member's record.
- Choose the action to deactivate the member.
- To bring someone back, use the option to activate them again.
Deactivate vs. delete vs. a sign-in ban — what's what.
- Roster deactivate (this action): the member stops showing up in the active roster, check-in lists, and attendance lists. Their record isn't deleted, and — importantly — they can still sign in to their own account. Reactivating restores them to the active lists.
- A sign-in ban is not a roster action. Stopping an athlete from logging in at all is a different thing, and it isn't something a team admin can do from the roster. Only the athlete's parent can do that, from the child's own page (Deactivate Account under Athlete Account Access), and it's reversible there. See Accounts, deactivation, and deleting your data.
- There is no "delete" on the roster. Deactivating keeps the person's history while hiding them. Erasing someone's data entirely goes through the data-deletion request, not the roster.
Export the roster as a file (CSV).
- On the Roster screen, choose the export/download option.
- The app creates a CSV file (a spreadsheet-friendly format) and saves it to your device or browser downloads.
- Open the file in a spreadsheet app if you want to sort or filter it there.
What you should see: after deactivating, the member disappears from the active roster view; after activating, they reappear. After exporting, a CSV file is downloaded containing the team's roster rows. The export is always the whole team's roster — it doesn't depend on the search or filters showing on your screen at the time.
Notes and limits
- The roster lists athletes even before they have created an account — they appear with a "no account yet" status until they sign up.
- Coaches see roster and medical-related info only within the rules the app applies (see Medical and consents).
- CSV export and member activation/deactivation are admin-only; if you don't see those options, you're not a team admin on this team.
- The exact label of the export button isn't confirmed in the source material — look for a download/export icon on the Roster screen.
Related pages
- Groups — training groups and the practice-readiness flags shown on the roster.
- Medical and consents — emergency contacts and consents stored on an athlete's record.
- Accounts, deactivation, and deleting your data — roster deactivation vs. blocking sign-in vs. deleting data.
- Team fees — admins set what athletes owe.